Have you ever stepped back after painting and felt that little drop in your stomach? The wall looked fine and wet. Then it dried. Now you’ve got streaks, patches, roller lines, maybe even fuzzy lint stuck in the paint. Not great. A lot of the time, the problem isn’t your technique. It’s the roller cover. Cheap or worn-out roller sleeves can wreck an otherwise solid paint job. I’ve seen it happen with everything from full-size rollers to small 4 inch paint roller covers people grab for trim and tight areas. Same story. Bad cover, bad finish. The good news? You can fix it. And you don’t need to start from zero.
Why Poor Roller Covers Cause Uneven Paint
Not all roller covers are built the same. Some shed lint. Some don’t hold enough paint. Others hold too much and dump it unevenly. A low-quality roller sleeve won’t load paint evenly across its nap, so when you roll it on the wall, you get heavy spots and dry patches in the same pass. Then there’s nap thickness. If you’re using a thick nap meant for rough brick on a smooth drywall surface, you’ll leave texture where you didn’t want any. Go too thin on a textured wall, and you won’t reach into the grooves. Cheap foam covers? They can leave bubbles. Worn-out rollers flatten out and stop distributing paint properly. It’s not dramatic. It’s subtle. But once the paint dries, every flaw shows up.
Step One: Let the Paint Fully Dry Before You Touch It
This part’s boring but important. Don’t try to fix uneven paint while it’s still tacky. You’ll just make it worse. Let it dry completely. That might mean waiting a few hours. Sometimes overnight if the humidity’s high. Paint changes as it cures. Some streaks even out slightly on their own. Not always, but sometimes. So give it time. Once it’s dry, stand back and look at it in a different light. Natural light shows flaws better than overhead bulbs. Figure out exactly what you’re dealing with before you grab sandpaper or a roller again.
Light Sanding Fixes Most Roller Marks
If you’ve got roller lines, heavy edges, or visible lap marks, light sanding is your friend. I’m not talking about grinding the wall down. Just a gentle once-over with fine-grit sandpaper. 220 grit usually does the trick. You’re knocking down high spots and smoothing texture, not stripping paint. Run your hand over the surface. If it feels rough, sand it. If it feels smooth but looks blotchy, you might still need to sand lightly just to give the next coat something to grip. Wipe off the dust afterwards. Don’t skip that. Paint hates dust.
Prime Again If the Surface Is Patchy
Sometimes, uneven application exposes drywall patches or previous colour bleed-through. If you sand and still see flashing or dull patches, a quick spot-prime helps. You don’t always need to prime the whole wall. Just the problem areas. Use a small roller for blending so the primer doesn’t create its own texture difference. Let that dry properly. Rushing a primer is a mistake people make all the time. Then they wonder why the second coat still looks weird.
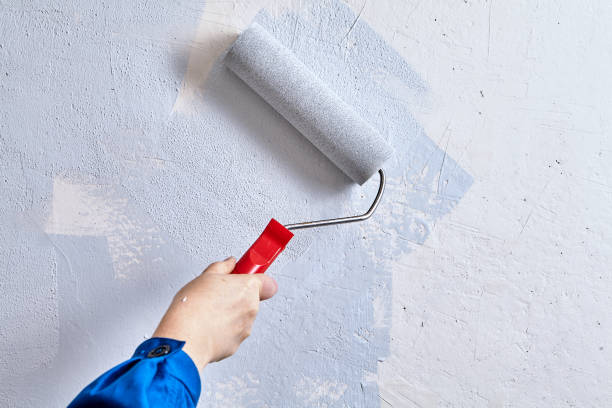
Upgrade Your Roller Cover Before Repainting
Here’s where you actually fix the root issue. Toss the bad roller cover. Don’t try to “make it work.” Get a high-quality roller sleeve suited to your wall type. Smooth walls usually need a 3/8-inch nap. Slight texture might need a 1/2-inch. Pay attention to what you’re buying. Even with smaller 4 inch paint roller covers for tight spots or cabinet sides, quality matters. A dense, lint-free microfiber or woven cover will hold paint evenly and release it consistently. That consistency is what prevents streaking. Cheap covers cost less upfront, sure. But you end up repainting. So what did you really save?
Load the Roller Properly (Most People Don’t)
Even with a good roller, bad loading can cause uneven paint application. Don’t dunk half the roller and call it a day. Roll it through the tray several times. Let the nap fully absorb the paint. Then roll it on the tray’s ridged area to spread the paint evenly across the sleeve. It should look saturated but not dripping. If paint is sliding off the edges, you overloaded it. If it feels dry after two passes on the wall, you underloaded it. You want that sweet spot where it glides without pressing hard. Pressing harder doesn’t help. It just creates lines.
Use Consistent Pressure and Overlapping Strokes
This sounds obvious, but it’s where uneven paint usually happens. People start strong, then get lazy halfway through a wall. Keep pressure even. Don’t push harder at the end of each stroke. Roll in a “W” or “M” pattern to spread paint, then fill it in without lifting the roller constantly. Overlap each pass slightly. Not perfectly. Just enough so you’re not leaving dry stripes between rows. And keep a wet edge. That’s big. If one section dries before you overlap it, you’ll see lap marks. Work in manageable sections.
Feather the Edges Near Trim and Corners
Edges are tricky. If you cut in with a brush and then roll too far away from that line, you’ll see a frame effect. Blend the rolled paint into the brushed edges while both are still wet. Use lighter pressure near the end of your stroke to feather it out. That softens the transition. Don’t jam the roller into the corner either. That leaves buildup. Let your brush handle the tight stuff. Then blend. It takes a bit of rhythm, honestly. But once you get it, it’s simple.
Fixing Small Areas Without Repainting the Whole Wall
If the uneven paint is limited to one section, you don’t always need to redo everything. Sand that specific area lightly. Wipe clean. Then re-roll just that section, slightly extending beyond it to blend. Use the same paint batch if possible. Paint can vary slightly between cans. Even the same colour, different mix dates, a tiny difference shows up. Keep your strokes consistent with the original direction. If you rolled vertically before, do it again. Switching direction makes patching more obvious.
Detail Work Matters More Than You Think
When you’re correcting uneven coverage around doors, trim, or tight edges, good tools matter. This is where 1 ½ inch paint brushes come in handy. A quality angled brush lets you smooth out heavy edges or touch up small streaks without dragging roller texture into spots it doesn’t belong. Cheap brushes leave bristles behind and uneven strokes, which kind of defeats the purpose. So if you’re fixing details, don’t sabotage yourself with bargain-bin brushes.
Conclusion: Fix the Tool, Fix the Finish
Uneven paint caused by poor roller covers is frustrating, yeah. But it’s not permanent. Most of the time, you’re just sanding lightly, upgrading your roller, and applying another even coat with better technique. That’s it. The biggest mistake people make is blaming themselves and trying to compensate by pressing harder or adding more paint randomly. Doesn’t work. The roller cover does half the job for you. If it’s low quality, the wall shows it.
Spend a few extra bucks on better roller sleeves. Load them right. Keep steady pressure. Blend your edges. Slow down a bit. Painting isn’t complicated, but it does punish shortcuts. Fix the tool first, then fix the wall. Do it once, do it right, and you won’t be staring at streaky patches every time sunlight hits the room.